To input new data sometimes we need to insert blank rows after every nth row to input additional information. Also, in Excel, we need to insert a blank row and column randomly so frequently. We will show you some quick and amazing ways to insert a blank row every nth row in excel.
📁 Download Excel File
To practice please download the Excel file from here:
Learn to Insert Blank Row After Every Nth Row in Excel with 4 Approaches
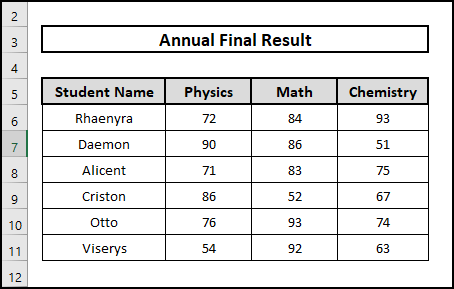
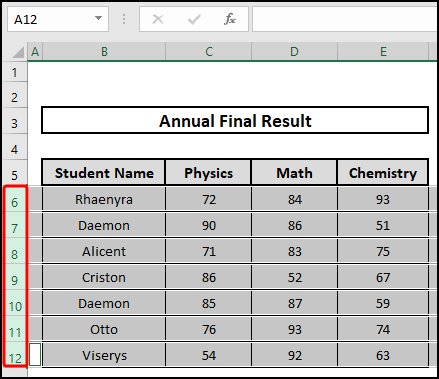
In these 4 quick approaches, we will be able to insert a blank row on every nth row in Excel. Considering a dataset of Annual Final Result. Here dataset consists of Student Names and Physics, Chemistry, and Math marks. There are also 5 columns and 11 rows in the dataset. We are going to discuss the use of VBA macro also.
1. Insert Blank Row Automatically After Every Nth Row in Excel
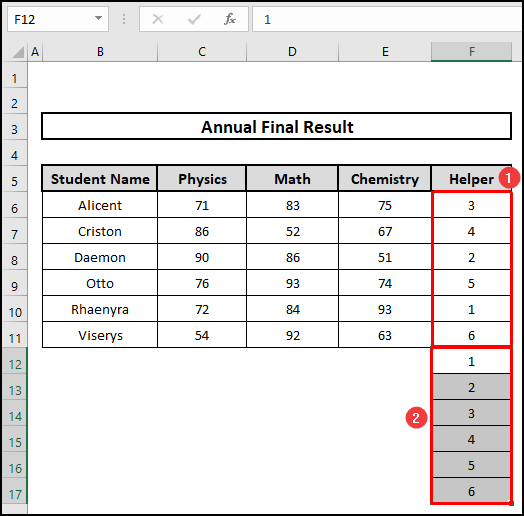
With the help of an additional column say, a Helper column and sorting option, you can create a blank row after every existing row. Please follow the necessary steps below.
⬇️⬇️ STEPS ⬇️⬇️
- Initially, Create a helper column in ascending order(1,2,3….)
- Secondly, Copy the entire helper column data and paste it to the bottom.
- Thirdly, Select the entire data.
- Next, Go to the Home tab from the Top Ribbon and click on Sort and Filter from the Editing menu.
- Then, Select Filter.
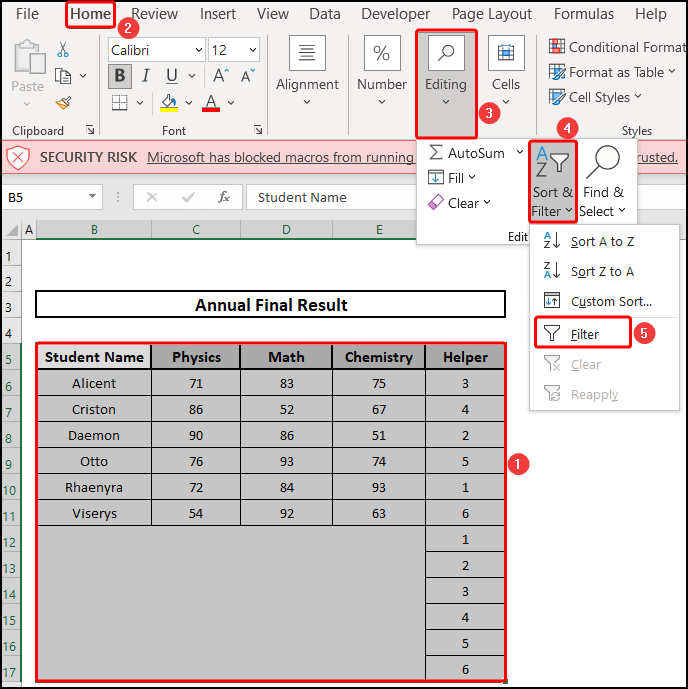
- After that, A Drop-down box will appear beside every heading.
- Then, Click on the Drop-down box of Helper
- Next, Select Sort Smallest to Largest.

- Afterward, a row separated with sorted data will take place.
- But, we need to remove the selected numbers.
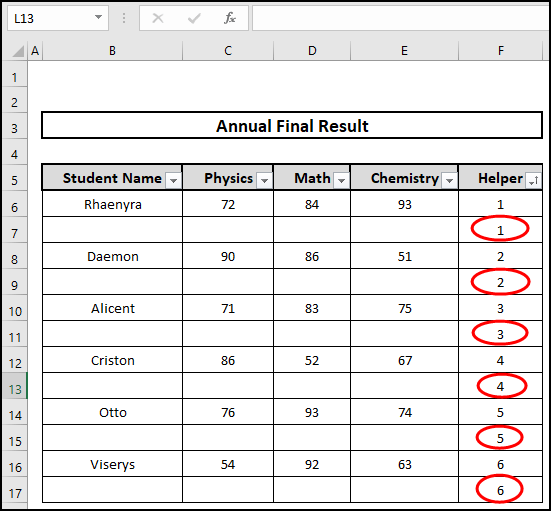
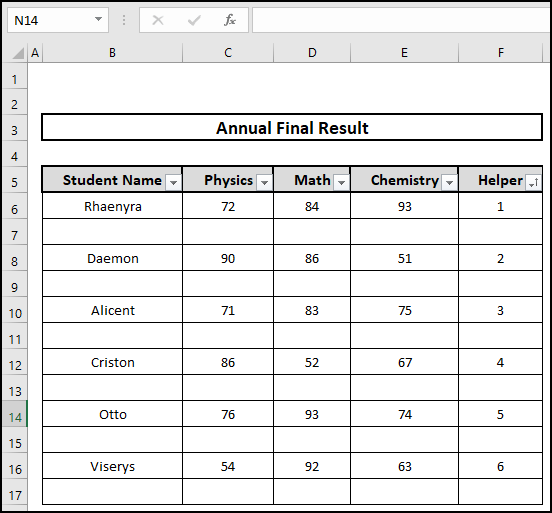
- Lastly, we get a blank row after every row and we get the final output.
 Read More: 3 Ways to Insert Rows Between Data Using Formula in Excel
2. Create a Macro Using VBA Code to Insert Blank Row After Nth Row
We can use VBA code to insert a single row or multiple rows in any position. With the help of the Developer option, you can generate a program of your own. Please follow the steps.
⬇️⬇️ STEPS ⬇️⬇️
- Check first if your Developer option is available or not.
- To enable the Developer option, right-click on the mouse at the top Ribbon and select Customize the Ribbon.

- Click on Developer and click on OK.
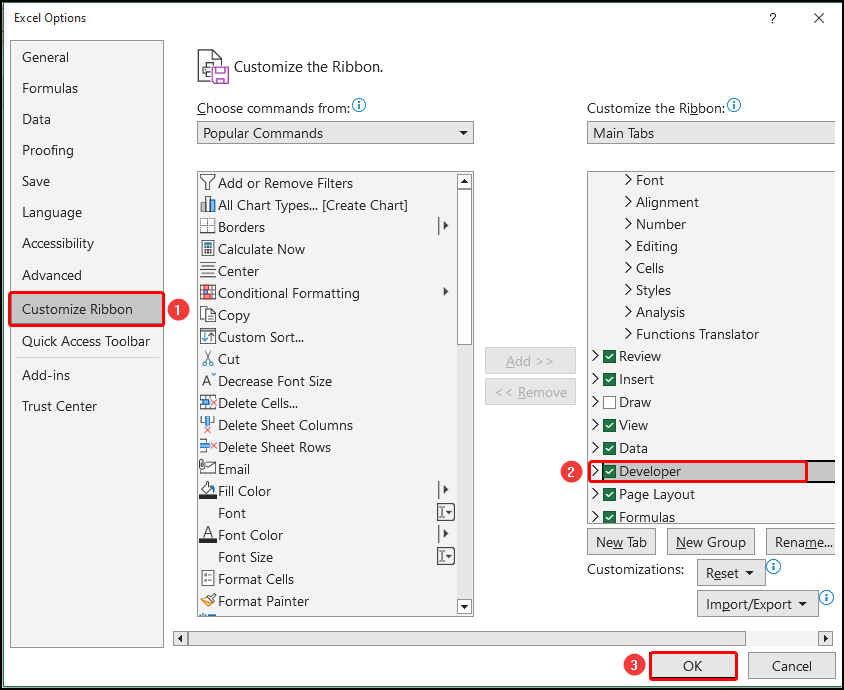
- Now Developer mode is on.
- Then Click on the Visual Basic option.
- After that To insert the VBA code, click on Module from the Insert option.
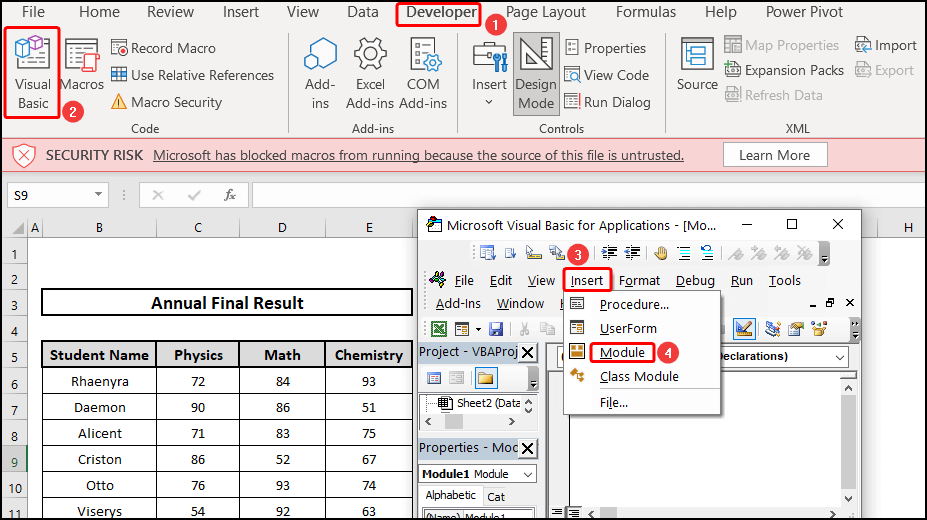
- Now, Insert the code to insert multiple rows.
- Then Click run to execute the program.
Code
Sub insert_multiplerow()
Dim p As Long
Dim q As Long
Dim z As Long
q = InputBox(Prompt:="Number of Rows You Want to Insert?")
p = InputBox(Prompt:="Row Number After Which You Want to Insert")
For z = 1 To q Rows(p).EntireRow.Insert
Next z
End Sub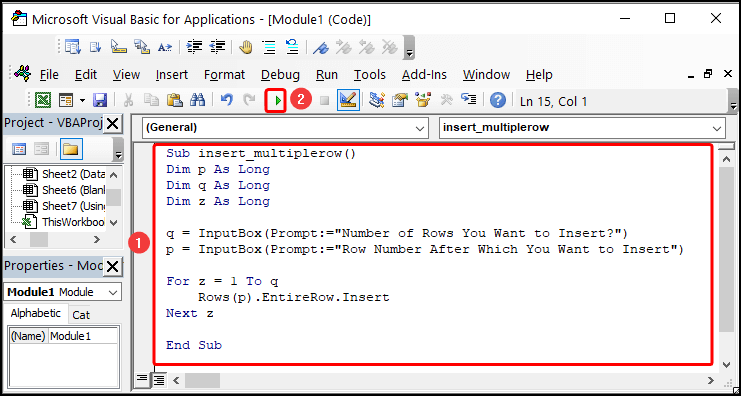
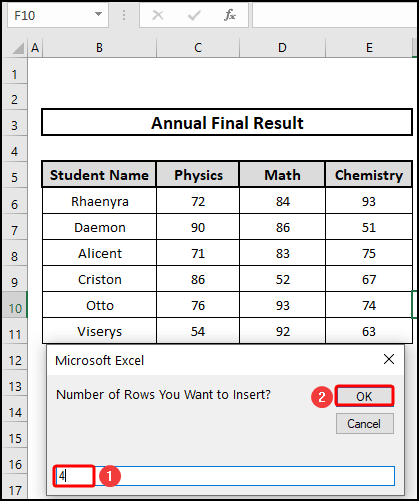
- Next, Insert the no of rows you want and click OK.
- Again Insert the row number after you want to insert it and click OK.
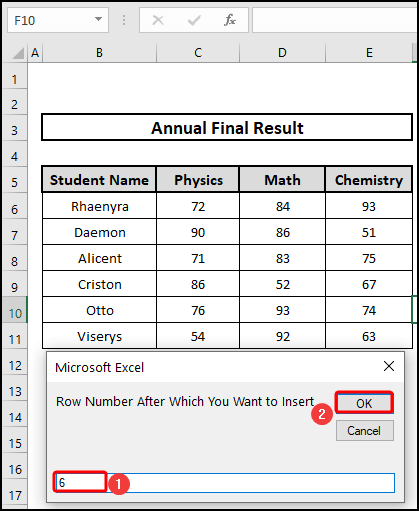
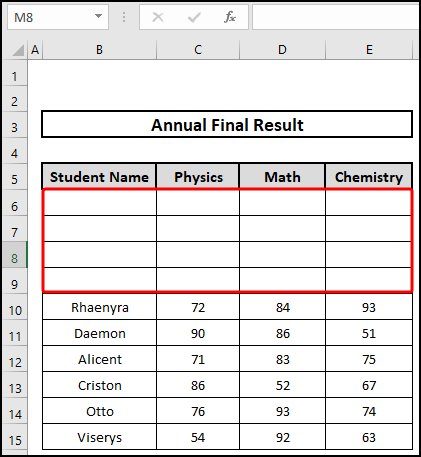
- Finally, we inserted 4 rows after 6th row. Therefore, we got 4 rows in the desired position.
Read More: 4 Easy Ways to Insert a Total Row in Excel
3. Insert Blank Rows Between Data Automatically in Excel
You can insert rows after every column by just selecting rows. Follow the below steps to insert rows.
⬇️⬇️ STEPS ⬇️⬇️
- First, Select a row.
- Then holding Ctrl, select the rows one by one.
- Next right click on the mouse and a context menu will appear.
- After that, Click on Insert from the Context Menu.
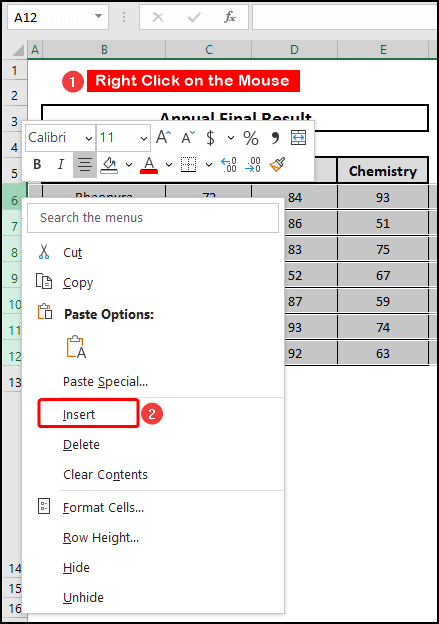
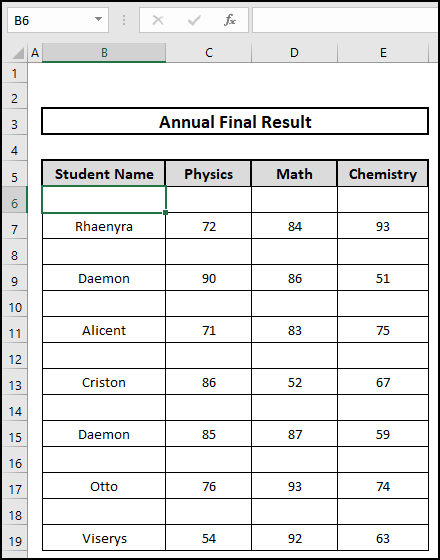
- Finally, a blank row is inserted after every existing row.
Read More: 7 Quick Ways to Insert a Row Within a Cell in Excel
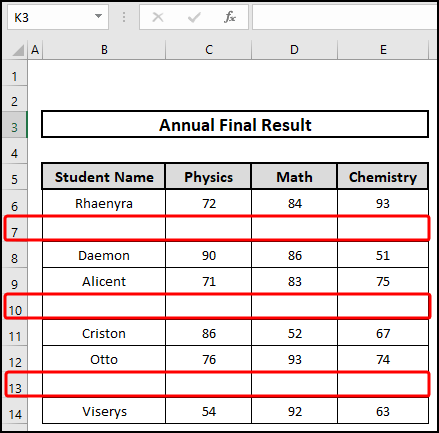
4. Insert Blank Rows After Every N Rows Using VBA in Excel
Suppose you need to insert rows after every 2 rows. Please follow the steps below,
⬇️⬇️ STEPS ⬇️⬇️
- Following the same steps, insert the VBA code.
- Click Run to execute the code.
Code
Sub insert_row_after_every_row()
Range("7:7,9:9,11:11").Select
Range("A11").Activate
Selection.Insert Shift:=xlDown, CopyOrigin:=xlFormatFromLeftOrAbove
End Sub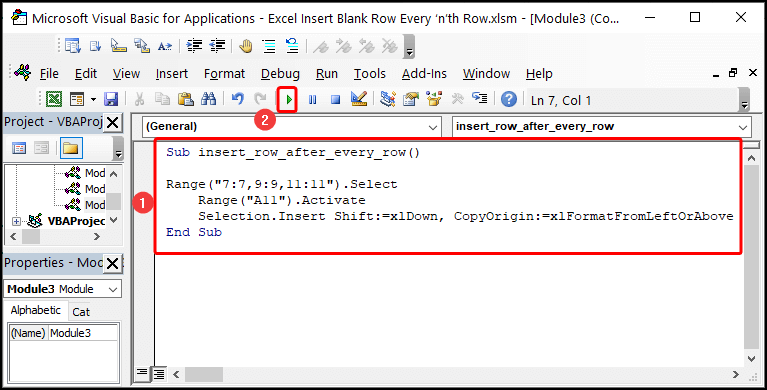
- Finally, get the desired blank row after every 2 rows.
📄 Important Notes
🖊️ Be careful and measure correctly while inserting rows. Sometimes it may insert in the wrong position.
🖊️ Save as .xlsm to run with VBA Marco code further.
🖊️ During working with VBA code, Check first whether your Developer tool is available or not.
📝 Takeaway from This Article
📌 Now you will be able to insert rows after every ‘nth’ position correctly using these amazing approaches.
📌 Columns can also be inserted using these methods.
📌 Simple use of VBA code is also discussed.
Conclusion
We tried every possible way to show you how blank row after every nth row. I hope you enjoyed your learning. Please leave your thoughts below. For better understanding and new learning don’t forget to visit www.ExcelDen.com.