Do you need to calculate days, months, or years from a given date? Are you tired of calculating date ranges using a calculator? Are you curious to know the exact age including days, months, and years? Yes, you got it right. Calculating manually is hectic. To easier our job, here is MS Excel. Perhaps, we are here to teach you to calculate date ranges in Excel. To calculate the date range in Excel we are going to use several methods. Let’s get started.
📁 Download Excel File
To practice please download the Excel file from here:
Learn to Calculate Date Range in Excel with These 9 Methods
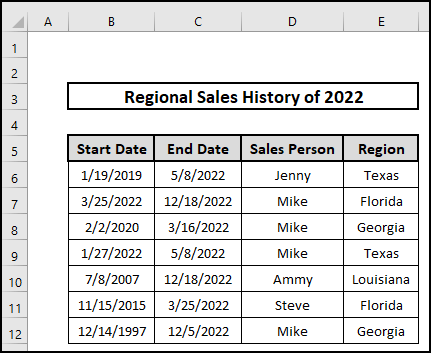
To calculate the date range in Excel, we consider a dataset named Regional Sales History of 2022 containing the Start Date, End Date, Sales Person, and Region. There are 5 columns as well as 12 rows in the dataset. In this article, to calculate the date range in Excel, we are going to use the Simple Arithmetic calculation, TEXT, DATEDIF, and ROUNDDOWN functions.
1. Use Simple Arithmetic Calculation to Add in a Date Range
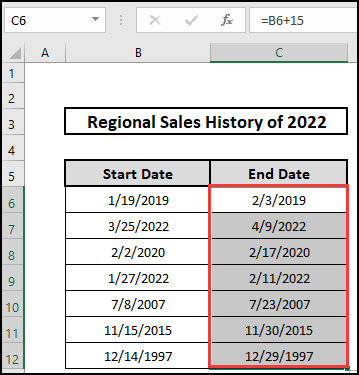
One of the most frequent methods is to calculate arithmetically just by adding or subtracting days from a given day. Here let’s follow the below steps.
⬇️⬇️ STEPS ⬇️⬇️
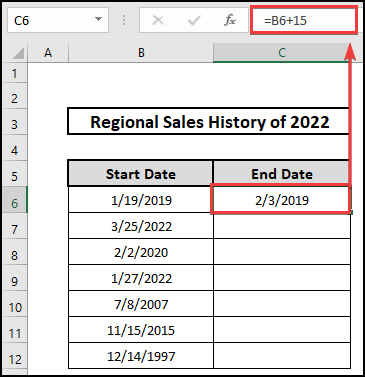
- Initially, select a blank cell i.e. C6 to get the end date after 15 days.
- Secondly, insert the following formula in C6 to get the output.
- Thirdly, get the End Date at the C6 cell which is after 15 days.
- Fourthly, pull the mouse cursor down to fill the cells automatically.
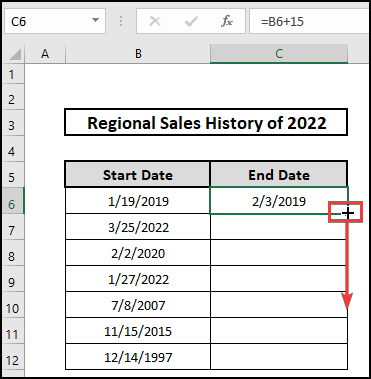
- Finally, we obtain each End Date after 15 days.
 Read More: 7 Tricks to Apply SUMIFS in Date Range with Multiple Criteria
2. Pull Data from Date Range in Excel
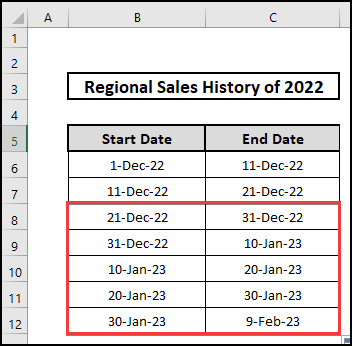
Suppose you have some task of a project to run sequentially by every certain period of time. To get the job done, please follow the steps.
⬇️⬇️ STEPS ⬇️⬇️
- Primarily, insert values at B6, B7, C6, and C7. Let’s say, the duration of the task is 10 days.
- Then, select the cells B6:C7.
- Next, pull down the mouse cursor to autofill cells.
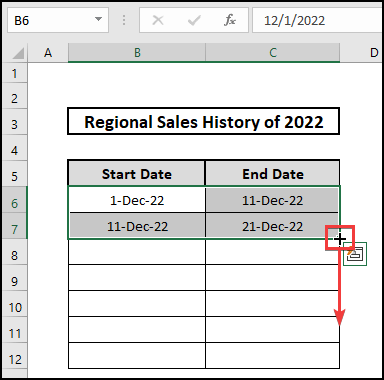
- Finally, we get similar dates after every 10 days.
3. Create Date Range Inserting TEXT Function
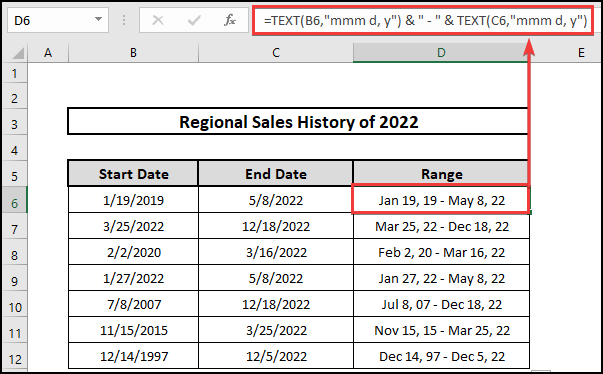
To create a date range from the start date and end date, the TEXT function is inevitable. Please check out the procedure.
⬇️⬇️ STEPS ⬇️⬇️
- Primarily, select a blank cell i.e. D6.
- Then, insert the following formula containing the TEXT function.
🔨 Formula Breakdown
👉 General logical expression: TEXT(cell_ref,”month day, year”).
👉 TEXT function takes the values from B6 and C6. Then it writes down as Jan 19,19 to May 8, 22 respectively.
- Lastly, by auto-filling the column we get the final date of range from two columns.
Read More: 11 Examples to Do SUMIF in Date Range of Month and Year
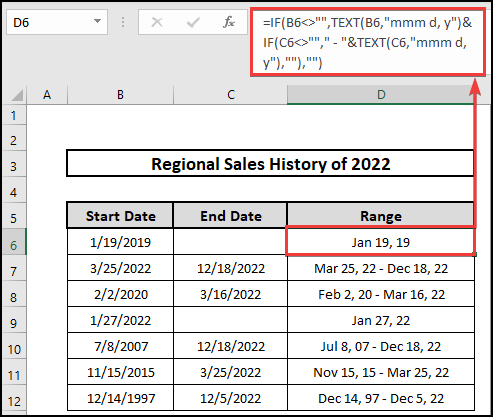
4. Create Date Range If Start or End Date Is Missing Using IF Formula
You can also create a date range if the start date or end date is missing using a combination of IF and TEXT functions. Please follow the necessary steps below.
⬇️⬇️ STEPS ⬇️⬇️
- Primarily, select a blank cell i.e. D6.
- Then, insert the following formula containing the combination of IF and TEXT functions.
🔨 Formula Breakdown
👉 From the 7th row, the TEXT function takes the values from B7 and C7. Then it writes down as Mar 25, 22 to Dec 18, 22 respectively.
👉 But if any values of column B and C is empty, then it will be left with the only value.
👉 However, the D6 and D9 where the End date is missing, still their range is showing with the only data.
- In the end, we obtain the final data of range by auto-filling the cells.
5. Calculate Difference of Date Range
One can easily count down the days from the start date to the end date just by selecting the cells and subtracting them from each other. Please follow the necessary steps.
⬇️⬇️ STEPS ⬇️⬇️
- Initially, select a blank cell i.e. D6.
- Next, insert the following formula. Or, Just select cells and subtract them from each other.
- Finally, by auto-filling the cells after having a value in D6, we get the final output.

6. Calculate Weeks from Date Range
If your boss asks you to calculate weeks from the date set where only the start date and end date are available, what to do in this case? Please Stay tuned with us.
⬇️⬇️ STEPS ⬇️⬇️
- Firstly, select a blank cell i.e. D6.
- Secondly, insert the following formula containing the DATEDIF function.
- In the end, we obtain the weeks from the two columns by auto-filling the cells.
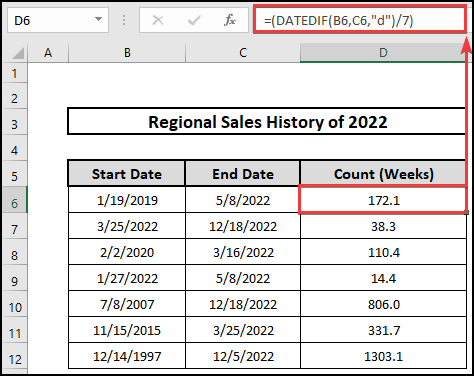
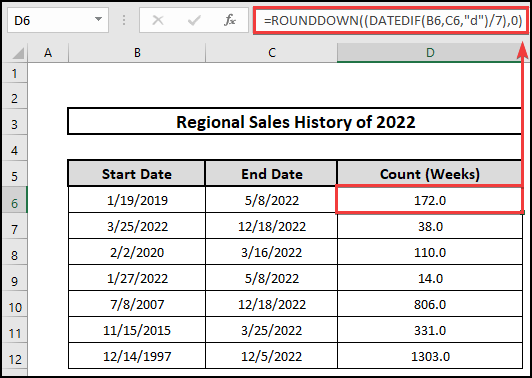
- Again, If we intend to avoid decimals from the data, we can use the ROUNDDOWN function.
🔨 Formula Breakdown
👉 (DATEDIF(B6,C6,”d”)/7) dictates to subtract B6 from C6 and divided the values by 7. In this case, we get 172.1 weeks.
👉 To eliminate decimals, we need to use the ROUNDDOWN function and results in 172.0 weeks.
- Therefore, we count the weeks without decimals from a dataset.
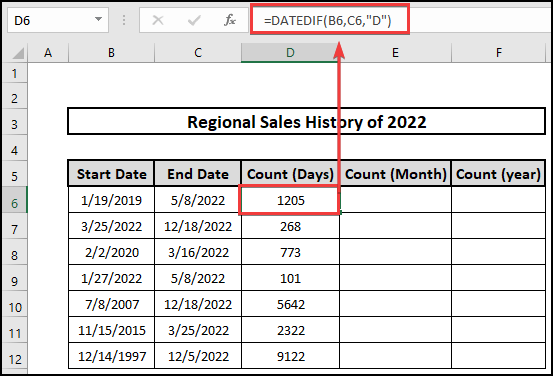
7. Calculate Days, Months and Years Difference Using DATEDIF Function
To count days, months, and years separately, the DATEDIF function is the dedicated one. Please follow the steps.
⬇️⬇️ STEPS ⬇️⬇️
- Firstly, select a blank cell i.e. D6.
- Secondly, insert the following formula containing the DATEDIF function to count days.
- Thirdly, counting from B6 to C6, the DATEDIF function only calculates the days in that certain period of time.
- Therefore, by auto-filling the cells of the column, we get the days in that certain period.
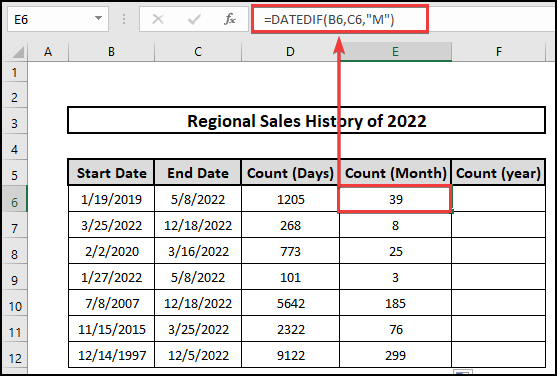
- Again, insert the following formula containing the DATEDIF function to count months.
- Next, counting from B6 to C6, the DATEDIF function only calculates the months.
- Therefore, By auto-filling the cells of the column, we get the months in that certain period.
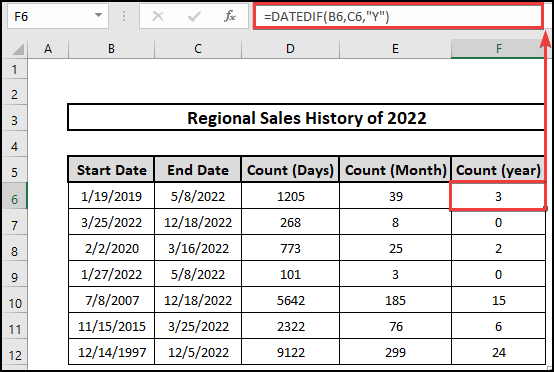
- Again, insert the following formula containing the DATEDIF function to count months.
- Then, counting from B6 to C6, the DATEDIF function only calculates the years in that period of time.
- Therefore, By auto-filling the cells of the column, we get the years in that certain period.
8. Calculate Days, Months, and Years Between Two dates in Excel
Using the DATEDIF function, it is also possible to calculate days, months, and years altogether from the Start time to the End time in one cell. Please follow the steps.
⬇️⬇️ STEPS ⬇️⬇️
- Primarily, select a blank cell i.e. D6.
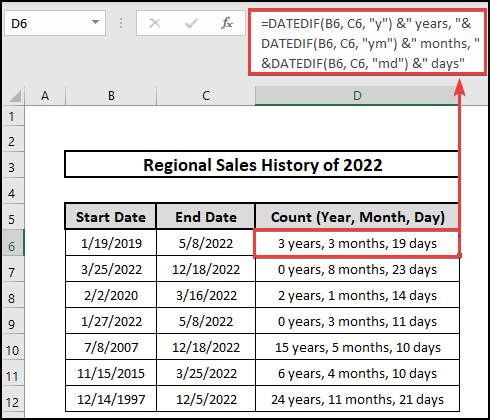
- Secondly, insert the following formula containing the DATEDIF function to count days, months, and years altogether.
🔨 Formula Breakdown
👉 DATEDIF(B6, C6, “y”) &” years ;calculates years from the period B6 and C6.
👉 DATEDIF(B6, C6, “ym”) &” months ;calculates months from the period B6 and C6.
👉 DATEDIF(B6, C6, “md”) &” days ;calculates days from the period B6 and C6.
👉 Then years, months, and days join together by comma(,).
- Finally, By auto-filling the cells of the column, we get the years, months, and days in that certain period of time.
9. Calculate Age by Counting Days from Birth Date to Today in Excel
Using the DATEDIF function, you will be able to calculate age from one’s date of birth. In this case, we have to use the TODAY function to measure dates till today. Please follow the below steps to calculate age.
⬇️⬇️ STEPS ⬇️⬇️
- Firstly, navigate a blank cell i.e. D6.
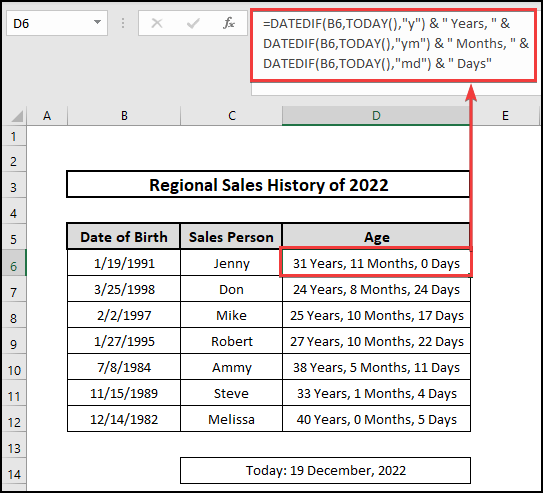
- Secondly, insert the following formula containing the DATEDIF function as well as TODAY functions to calculate age.
🔨 Formula Breakdown
👉 DATEDIF(B6,TODAY(), “y”) &” years“;calculates years from B6 to today.
👉 DATEDIF(B6,TODAY(), “ym”) &” months“;calculates months from B6 to today.
👉 DATEDIF(B6,TODAY(), “md”) &” days“;calculates days from from B6 to today.
👉 Then years, months, and days join together by a comma(,).
- Lastly, By auto-filling the cells of the column, we get the age of each person including years, months, and days.
📄 Important Notes
🖊️ DATEDIF function only works allowing dates including days, months, and years.
🖊️ TODAY function allows gathering data till today.
🖊️ ROUNDDOWN function writes the number without decimals.
📝 Takeaway from This Article
📌 DATEDIF function to determine the difference between days, months, and years.
📌 ROUNDDOWN function to eliminate decimals.
📌 TODAY functions to calculate the age of a person.
📌 Counting dates manually is also possible following the above approaches.
Conclusion
We demonstrated every possible to calculate date ranges in Excel. I hope you enjoyed your learning. Any suggestions, as well as queries, are appreciated. For better understanding and new knowledge, don’t forget to visit www.ExcelDen.com.