In this lesson, I’ll demonstrate 5 effective approaches to convert a column to comma separated list with single quotes in Excel. Moreover, these techniques will enable you to solve the problem that led you here. However, you will master several crucial Excel features and functions during this article, which will come in extremely handy for any assignment using Excel.
📁 Download Excel File
The sample worksheet that was used during the discussion is available to download for free right here.
Learn to Convert Column to Comma Separated List with Single Quotes in Excel with These 6 Methods
Here in this article, we will learn how to convert a column to a comma separated list with single quotes in Excel using different approaches. To be exact, I’ve provided a total of 6 methods down below.
1. Using Ampersand Sign and Comma
Here we will be using the Ampersand Sign and Comma Sign to create a formula.
⬇️⬇️ STEPS ⬇️⬇️
- Firstly, type in the following formula here I’ve given for you.
=”‘”&B6&”‘”&”,”&”‘”&B7&”‘”&”,”&”‘”&B8&”‘”&”,”&”‘”&B9&”‘”
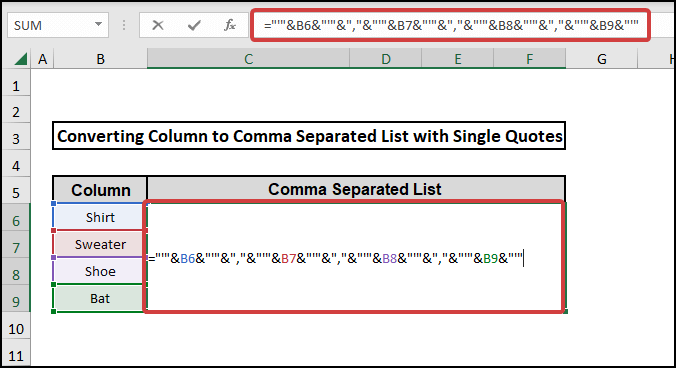
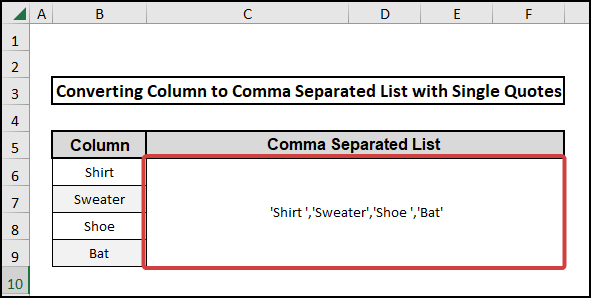
- After that press Enter to get the results.
2. Implying CONCATENATE Function
Here we will be using the CONCATENATE function along with Comma and Quotation signs to create a formula.
⬇️⬇️ STEPS ⬇️⬇️
- Firstly, type in the following formula here I’ve given for you.
=CONCATENATE(“‘”,B6,”‘,”, “‘”,B7,”‘,”,”‘”,B8,”‘,”,”‘”,B9,”‘”)
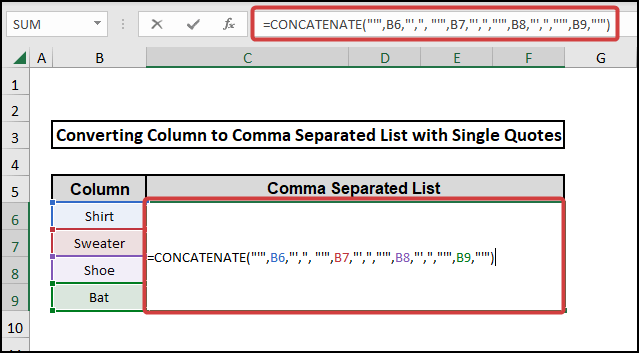
- Press Enter to get the results.
📕 Read More: Transpose Formulas Without Changing References in Excel
3. Applying TEXTJOIN and CHAR Functions
Here we will be using the TEXTJOIN function along with the CHAR function to create a formula.
⬇️⬇️ STEPS ⬇️⬇️
- Firstly, type in the following formula here I’ve given for you.
=CHAR(39)&TEXTJOIN(“‘,'”,TRUE, B6:B9)&CHAR(39)

- Press Enter to get the results.
4. Using VBA to Create Function
Here we will be using the VBA code to manually create a function that will convert a column to a comma separated list with single quotes.
⬇️⬇️ STEPS ⬇️⬇️
- Firstly, enable your developer tab. After that go to the Visual Basic option from the Developer Tab of the ribbon.

- After that, a window will pop up. Select Module from the Insert of the window.

- Now simply copy the following formula I’m providing here for you.
Function ColumntoRow(CColRange As Range)
    Dim OutputMem
    Dim CCount As Variant
    For Each CCount In CColRange
        If Not IsEmpty(CCount.Value) Then
            OutputMem = OutputMem & "'" & CCount.Value & "',"
        End If
    Next
     ColumntoRow = Left(OutputMem, Len(OutputMem) - 1)
End Function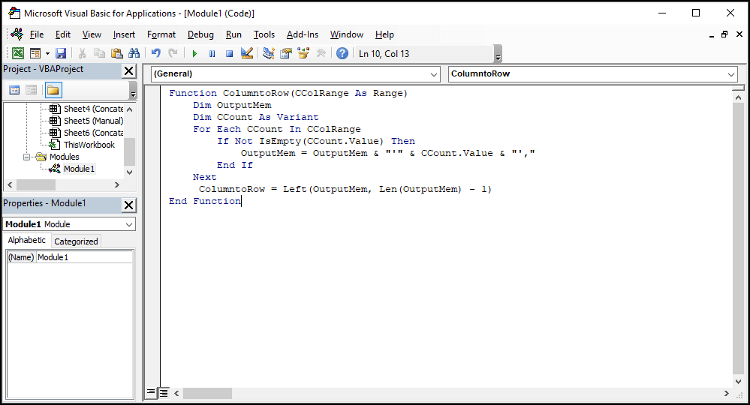
- Now save the formula as a Macro-enabled workbook.
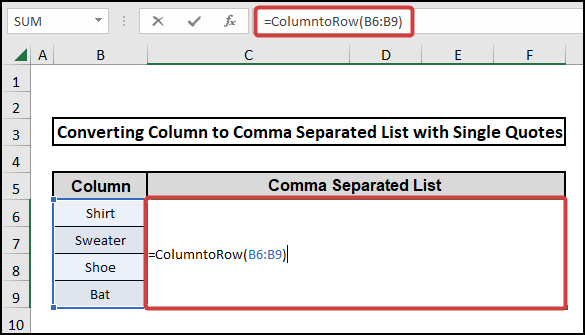
- After all, these go to your dataset and use the function we just created. For instance, I’m providing the formula below.
=ColumntoRow(B6:B9)
- After that press Enter to get the results.
5. Utilizing Find and Replace Tool
Here we will be using the Find and Replace Tool from Microsoft Word copying the data from Excel to Word. It is a very inefficient way though yet I’m just making sure you can learn all the approaches.
⬇️⬇️ STEPS ⬇️⬇️
- First, select all the data of the column that you need to convert into a comma-separated list with a single quote and copy them using Ctrl+C or right-clicking on the mouse cursor.
- We will paste it using Ctrl+V into a blank Microsoft Word document and we will see something like this.
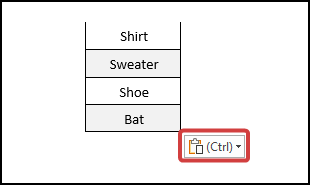
- After that, we will keep the texts only by selecting the Keep Text Only option from the paste menu as I’ve shown in the picture. Thus the borders of the texts will be gone.

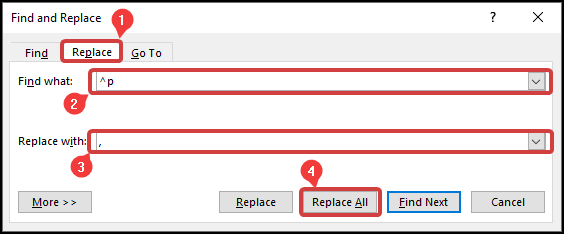
- Now press Ctrl+H to get the Find and Replace Then select the Replace option and type in ^p in Find what section and “,” (comma) in the Replace with section and click on Replace All.
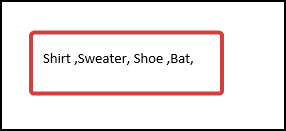
- After that, you’ll see the following result.
📕 Read More: Transpose Multiple Rows in Group to Columns with Formula in Excel
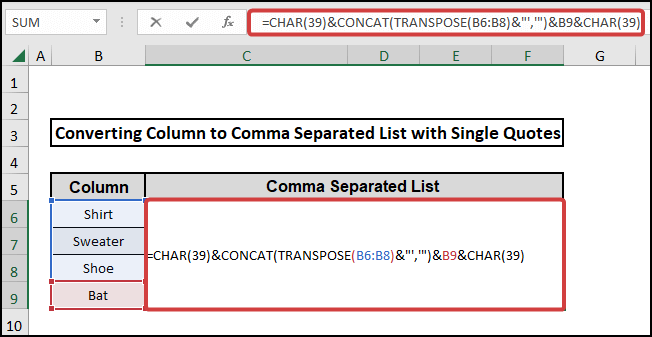
6. Implying CHAR, TRANSPOSE and CONCAT Functions
Here we will be using the Three different functions to convert columns to comma-separated lists with single quotes. We will be using TRANSPOSE, CONCAT, and CHAR functions.
⬇️⬇️ STEPS ⬇️⬇️
- Firstly copy down the following formula.
=CHAR(39)&CONCAT(TRANSPOSE(B6:B8)&”‘,'”)&B9&CHAR(39)
🔨 Formula Breakdown
👉 TRANSPOSE(B6:B8)
The TRANSPOSE function makes a horizontal arrangement of the cells B6 through B8.
👉 CONCAT(TRANSPOSE(B6:B8)&”‘,'”)
The CONCAT function brings together text from multiple ranges. Here &”‘,'” part defines that after every data ‘,’ will be shown. As a result, the last data will also likely have “,” and “ ‘ “ after it ends which we don’t want. That’s why we selected the range without the last data B9.
👉 &B9&CHAR(39)
Here & adds up B9 with the result and the CHAR(39) provides the character specified by the number 39 which is a single quote.
- After that press Enter to get the results.
📕 Read More: 8 Ways to Transpose Multiple Rows in Group to Columns in Excel
📄 Important Notes
🖊️ Be careful while using the code as there are a lot of terms and if you lose concentration the code may be incorrect.
🖊️ Use shortcuts to reduce time.
🖊️ While writing formulas carefully see the suggestions and don’t forget the commas and parentheses.
🖊️ Be careful while defining criteria to be accurate as the dataset.
📝 Takeaways from This Article
📌 Use of CHAR, TRANSPOSE, CONCAT, and TEXTJOIN functions.
📌 How to convert a column into comma separated list with single quotes.
📌 Creating formulas using multiple functions.
📌 Converting Columns into Rows.
📌 Creating custom functions using VBA codes.
📌 Different use of the Find and Replace Tool.
Conclusion
Firstly, I hope you were able to use the techniques I demonstrated in this Convert Column to Comma Separated List with Single Quotes lesson. As you can see, there are a lot of options on how to do this.However, decide deliberately on the approach that best addresses your circumstance. Most importantly I advise repeating the steps if you become confused in any of the steps if you get stuck. Practice on your own after taking a look at the Convert Column to Comma Separated List with Single Quotes Excel file in the practice workbook as I’ve provided above because practice makes a man perfect. Above all, I earnestly hope you can use it. Please share your experience with us in the comment box about how your experience was throughout the article and what we need to improve or add to make things better for you folks. However, if you have any problem regarding Excel spit it in the comment box. The Excelden crew is always available to answer your questions. In conclusion, keep educating yourself by reading. For more Excel-related articles please visit our website Excelden.com.